Over the years, high school teachers have increasingly had to adapt to a more technology-mediated teaching process. From keeping up with emails to posting content on whatever Learning Management System (LMS) the school uses to mastering the bewildering array of tools provided in the Google Apps for Education (GAFE)–Google Docs, etc.–we carry our laptops with us everywhere.
A few years ago it was popular for commuting software developers to describe their “Every Day Carry” bag, the things they include in daypack or messenger bag to survive a day of work. The EDC was an awkward fetishization of gear, tech, equipment, a “Boy Scouts on steroids” trope that appealed to a certain kind of tech bro.
Not that there isn’t something to be gleaned by sharing this kind of information. If your travel mug leaks, you might benefit from learning about what the cool kids carry. Are you a wired earbuds kind of gal, or are the AirPods Pro the best thing you’ve ever spent your money on?
Now that I’ve more-or-less settled into the new school year–a short commute to school in my car where I spend the day in my empty classroom, teaching primarily via Zoom–I’m able to share what I have at school, what I carry in my small daypack, and what I leave at home.
- What I have at school in my classroom
- An external monitor and USB-C adapter
- Power supply for laptop
- A collection of sodas, meal bars, etc.
- The usual office supplies
- What I bring to school
- iPhone 11 Pro (In a pinch, I might be able to teach my classes with nothing but the phone, but I wouldn’t want to try)
- Zojirushi coffee mug (Peet’s coffee, Major Dickerson’s)
- Carabiner with car/house keys, school keys
- Sunglasses
- Daypack (Mountain Tools Stealth pack, 21 liters)
- Apple MacBook Pro 16-inch
- Eagle Creek Small bag with
- Wacom Intuos Tablet (small) and cable, stylus
- USB-C to USB-A dongle/converter (2)
- Apple adapter (HDMI, USB-A, USB-C)
- Apple AirPod Pros, for conferencing
- Mask, Alcohol lotion
- Eagle Creek Micro bag with
- Wallet
- contacts solution
- pens
And that’s about it. No toolkits, no Swiss army knife, no Leatherman on my belt. I’m fortunate to live not far from my work, and as a computer science teacher I have access to computers at school if a replacement is needed.
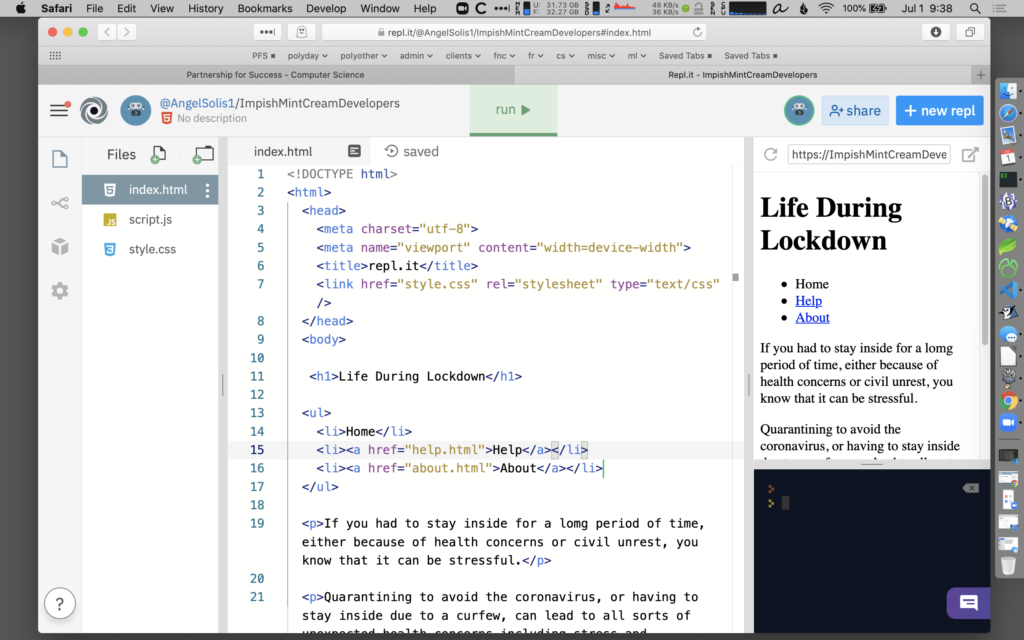
The real keys to my teaching at this point are the websites around which my curriculum has been organized. The course schedule, presentations, and activities and exercises, are all accessed from the website.
I’ve given some thought to my server (Dreamhost) and how robust the access is to that website. They’ve been good hosts, but things can go awry–just a couple of days ago there were some DNS issues that kept me from updating the website for a few hours. I have a local copy of everything on the laptop, of course, and can upload it to an alternative site with little difficulty, if necessary.
In that event, though, chances are that things are going to be lot more serious than just DNS. It’s a crazy time–crazy things can happen.
Workflow: how to do things
I run a second monitor at home and at school. Monitor 1 has the material I’m presenting, Monitor 2 has to-do list, calendar, email, and Zoom window for managing class.
The small Wacom Intuos tablet is used with the Screenbrush app to draw on the screen during presentations, or with Chrome and Kami extension to annotate PDFs that students submit in a shared Google Drive.
At home I plug an external keyboard (WASD) into the laptop and use a bluetooth Logitech M720 Triathlon mouse. The laptop itself sits on a Rain mStand.
Zoom conferencing software has been surprisingly stable. During classroom sessions I alternate between talking straight from the camera, and sharing my screen to go through a presentation highlighting material or working problems with them.